I found very little documentation on how to setup System Center Updates Publisher (SCUP) with a Microsoft PKI so here’s how I ended up getting it to work…
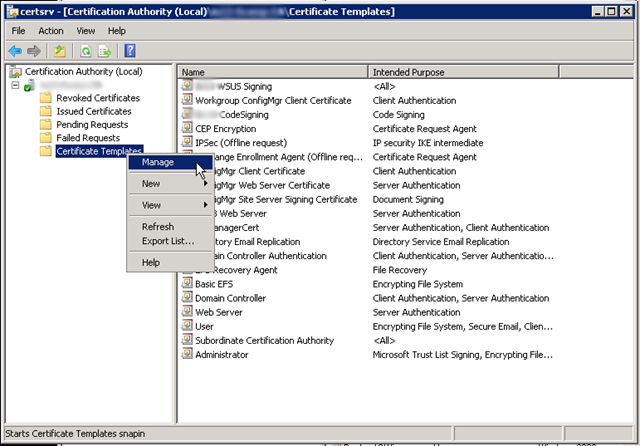
1.) First, you need to create a certificate template specifically for signing updates. I logged onto my issuing CA and opened the Certification Authority. Right-click on Certificate Templates and click Manage.
2.) I then proceeded to duplicate the computer certificate by right-clicking the Computer template, then clicking Duplicate Template.
3.) I selected the Windows 2003 Server, Enterprise Edition template properties.
4.) Next, I proceeded to name my template something I could easily identify Company Name WSUS Signing. I also set the Validity Period to 2 Years, and set the option to Publish certificate in Active Directory.
5.) On the Request Handling tab, I made sure the Purpose field was set to Signature and encryption and the minimum key size was set to 1024. The next critical step is to make sure the option for Allow private key to be exported is enabled. This will allow us to import the certificate and key into SCUP later on.
6.) On the Subject Name tab, I checked the option to Build from this Active Directory information and set the Subject Name Format to Common Name.
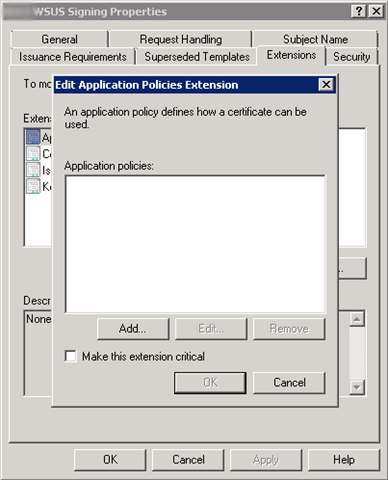
7.) The next step is crucial and one that is not really documented other then a forum post that hints to this. Click on the Extensions tab, then highlight the Application Policies and click Edit.
8.) Remove all the Application Policies from the list. This is VERY IMPORTANT. SCUP will not publish the updates properly if you use a certificate that contains an Application Policy Extension. You will end up with the following error message in your UpdatesPublisher.log file: Exception occurred during publishing: Verification of file signature failed for file: This message stumped me for awhile and I tried multiple certificates until I found a forum post suggesting the Server Authentication application policy extension causes the issue.
9.) To secure the new template a bit more, I setup my Security tab to only allow the server I’m running System Center Update Publisher & the SCCM Software Update point to request the new WSUS Signing certificate.
At this point I’m going to assume you understand how to request a certificate from your issuing CA so to save time I will skip the process and get right to the point where the certificate is installed in the Local Computer certificate store.
10.) Right-click on the newly acquired certificate and choose Export.
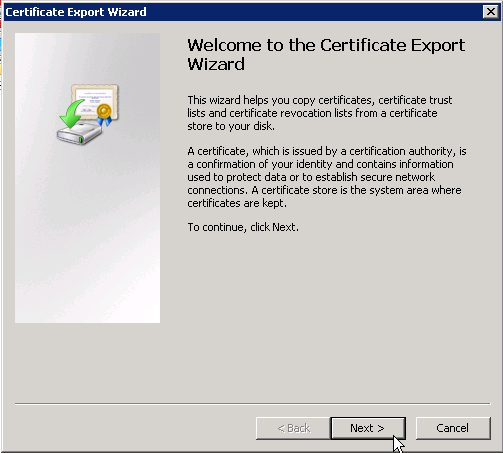
11.) Click Next on the first page of the wizard.
12.) Check the option to enable Yes, export the private key
13.) Leave the Export File Format and options at their defaults and click Next.
14.) Set a certificate export password and click Next.
15.) Click Browse and specify a location for the exported certificate.
16.) Finally, click Finish to complete the export process.
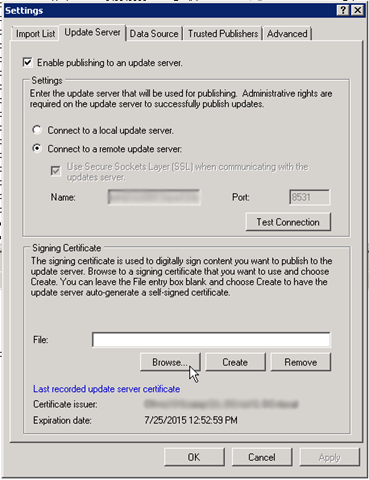
17.) Next, open the SCUP console and click on Settings.
18.) Open the Update Server tab and specify the update server settings if you haven’t done so already. Click the Browse button under the signing certificate and navigate to the location of your exported .pfx certificate. Select the certificate and click OK.
19.) Click the Create button and enter the password you set during the export process. Click OK.
20.) Click OK to close the SCUP Settings. Go back to the certificates console and expand the newly created WSUS folder. (You may have to refresh the console to see it)
21.) Right-click on the certificate and choose All Tasks –> Export to start the certificate export wizard.
22.) Click Next on the first page of the wizard.
23.) Check the option for No, do not export the private key and click Next. (Note: This is important as the copy of the certificate you are exporting will be distributed to all computers to be managed by Software Updates. You don’t want all the servers to also have the private key in case someone decides to do something malicious)
24.) Choose a format to export the certificate in and click Next.
25.) Select and export location like before and click Next and Finish to complete the wizard.
26.) Right-Click on the Trusted Publishers folder and select All Tasks –> Import
27.) Follow the steps in the wizard to import the newly exported certificate with the .CER extension into the Trusted Publishers folder. This tells the machine that any updates signed with this certificate are OK to install. As long as you are using a PKI with a trusted authority, you do not need to also put this certificate in the Trusted Root Certification Authorities folder.
The next steps are to distribute the certificate to the Trusted Publishers folder of every computer you will manage and deploy updates to through SCCM/SCUP and publish the updates.


Hi Mike,
you saved my weekend. Thanks alot for this excellent doc.
Regards,
Claus
Thanks for taking time-out to compile and post this information Mike.
Best Wishes
Enzio
Thanks for the information as you said, sparse information on the subject.
Thanks! These instructions are still relevant for SCCM 2012 and SCUP 2011.
One more…
I followed Jason’s tutorial and couldn’t publish to the SCCM server. Publish would fail with 800b0004 error (actually decimal equiv 2148204548) complaining that File cert verification failed and Failed to verify signature and Operation Failed with Error: Verification of file signature failed for file and finally, Publish: A fatal error occurred during publishing :Signature verification exception during publish.
So, I re-worked the certs using the steps outlined here; difference being I deleted Code Signing from the Application Policies Extension per direction and I checked Publish in Active Directory (step 4) which was unchecked in Jason’s instructions. Other’n that, I did exactly the same steps as before.
THEN…it works!
Thanks,000,000 from AjaxOfTheRockies
A big thank you. I spent way too long trying to figure this out on my own. I had figured everything out except for removing the application policies from the certificate template.